When you upgrade to a new iPhone, you don’t want to spend hours setting everything up from scratch to get apps, data, and settings just the way you like them. That’s why restoring from a backup is so convenient: a quick click, a little wait, and you’re good to go.
The same is true if a phone malfunctions or is frozen. Knowing that you can erase iPhone and easily recover your photos, documents and data from an iCloud or computer backup is reassuring.
A backup is also insurance that if your iPhone is lost or stolen, you won’t lose everything on it. It is easier to replace the device than the memories and other data stored on it.
Yes, backups are an essential part of modern digital life, which is why we’ve put together our How to Backup an iPhone or iPad guide. But knowing how to restore iPhone from that backup is equally important. Read on for our complete guide.
Step 1: Find your iPhone backup
First, make sure you have a backup you can restore from. Importantly, this backup should be recent enough to include the apps and data you want to keep, and/or old enough that it happened before the glitch if you’re trying to fix a faulty iPhone.
There are two places where you can find a backup, as long as you make backups. One is iCloud, which you may need to subscribe to to get enough space. The other method depends on whether you’re using a Mac or PC: on a Mac, iPhone backups are done through the Finder (in macOS Catalina and later) and on a PC (and older versions of macOS), they are done through iTunes.
To view iCloud backups, follow these steps:
- Open Settings on your iPhone or iPad.
- Tap your name/face at the top.
- Now tap on iCloud.
- Tap Manage account storage.
- Tap Backups.
- Tap a save to see when it happened.
- Computer backups
To view backups made on a Mac, follow these steps:
- Plug in your iPhone.
- Open the Finder.
- Click your device in the sidebar.
- On the General tab, click Manage Backups.
- If there are backups, you will see them here. (You’ll also see if iCloud backups are in progress).
The process is similar in iTunes:
- Open iTunes.
- Click iTunes in the top bar and select Preferences.
- Select the tab labeled Devices. The date and time of each backup are listed.
Should I back up first?
If you want to make a backup that you can recover to a new iPhone and you’re not sure you have a recent enough backup, play it safe by making another backup of the old device now.
If you’re hoping to fix a problem with your iPhone that started recently and you have an old iPhone backup that you can recover, don’t back up your iPhone, the old backup may be your best bet to get your iPhone working new. This applies if you want to recover your iPhone to a time before installing a beta version of iOS or even if you want to recover an older version of iOS after having problems with the latest version.
Step 2: Wipe your iPhone
If you just recovered the backup to a brand new iPhone or an iPhone that has been erased before, you can skip this step.
However, if you are trying to fix a problem with your iPhone, want to remove a beta version, or want to erase the iPhone that you need to pass on to a new owner, you will need to erase it first. You cannot restore an iCloud backup to an iPhone without erasing the contents first.
This process is easier if you’re recovering an old iPhone that’s running the same version of iOS you intend to run. It gets a lot harder if you’re trying to restore an older version of iOS, especially if you’re using a beta version of iOS, in which case you might need to plug it into a Mac, force the iPhone into recovery mode, and restore it. in this way. We discuss it here: How to remove a beta version of iOS from your iPhone.
Normally, resetting your iPhone so you can retrieve a recent backup is a straightforward process and hopefully one of these two options will work:
On an iPhone:
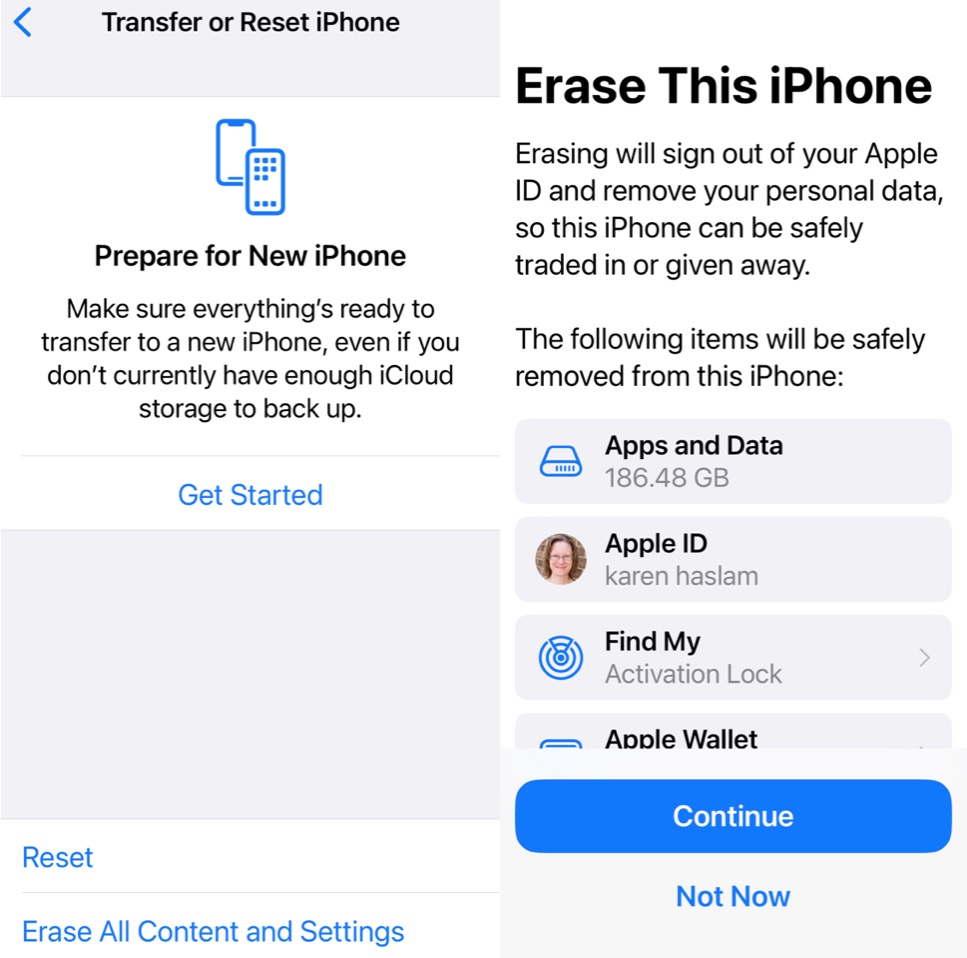
- Open Settings.
- General.
- Transfer or reset iPhone. Erase all content and settings.
- Erase then follow the different steps.
- Your iPhone should restart with the welcome screen if this process worked.

Foundry
On a Mac:
A second option is to plug your iPhone into your Mac and restore it from Finder.
- Open the Finder.
- Click on your iPhone in the left column.
- Click Restore iPhone.
- Click Don’t Backup.
- Click Restore.
- Your iPhone should restart with the welcome screen if this process worked.
On a Mac using Recovery Mode:
Here’s how to put your iPhone into recovery mode so you can erase it (if the options above don’t work):
- Plug your iPhone into your Mac.
- Open the Finder.
- You may see a message that you need to download an update to access the iPhone, in our experience, said software was not available on the software update server, so don’t worry about that. subject.
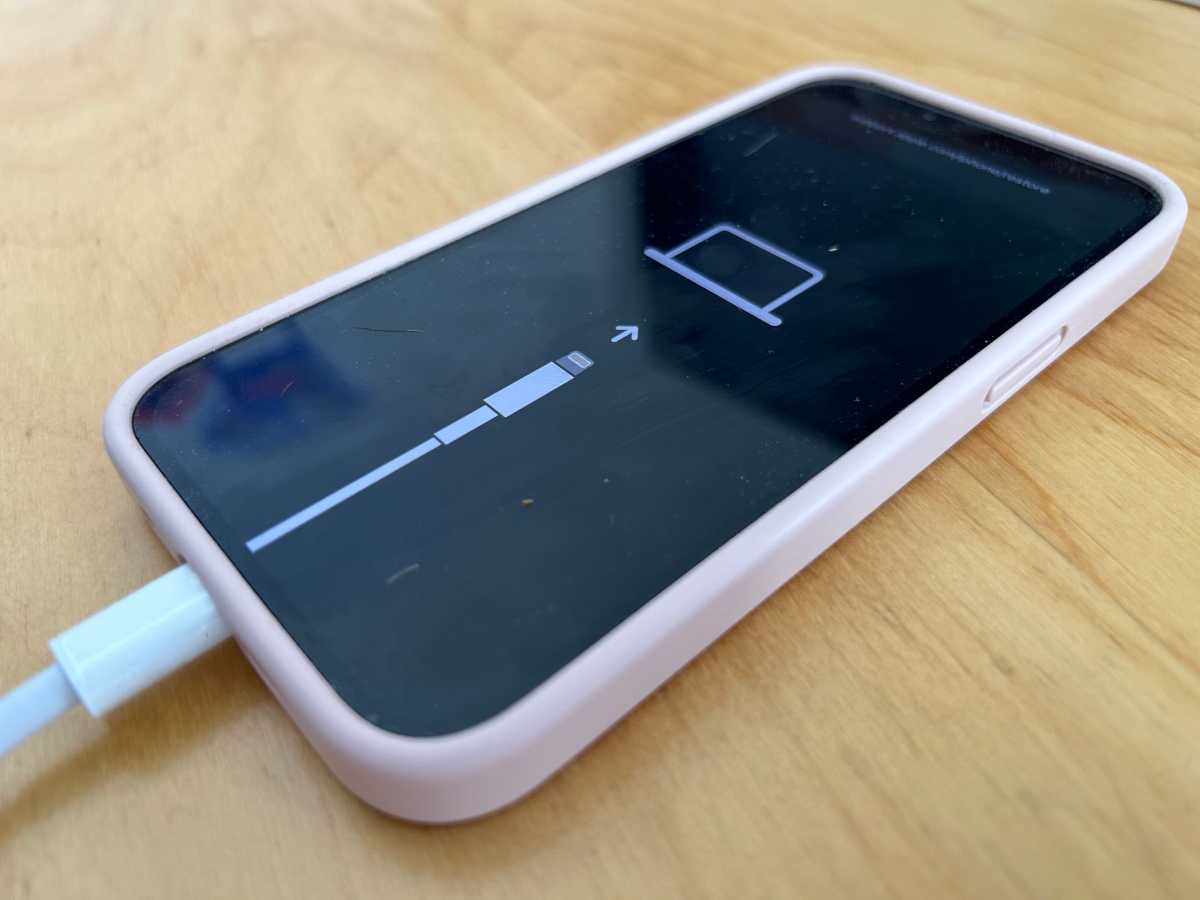
- Turn off your iPhone by pressing volume up, volume down, then press and hold the side button. Unlike a usual reboot, press and hold the side button while the phone shuts down and restarts. If successful, you’ll see an image of a Mac and a Lightning connector on your iPhone indicating that it’s in recovery mode.
- On your Mac, you should now see a message that there is a problem with the iPhone that needs updating or restoring. Click Restore.
- You will see a warning: “Are you sure you want to restore iPhone…” Click Restore and Update.
- Click Accept on the next screen which details the license agreement.
- Just note that there are only about 15 minutes left before your iPhone exits recovery mode, in which case you will need to enter recovery mode again.
- Your iPhone should restart with the welcome screen if this process worked.

Foundry
If that didn’t work for you, the next option is DFU mode. We explain how to put an iPhone into DFU mode separately.
Step 3: Restore your iPhone from a backup
Now that you have erased your iPhone, you can continue the recovery process from your backup. Or, if you have a brand new iPhone, you can follow these steps to set it up as a clone of your old iPhone with all your data as you left it.
How to Recover from iCloud Backup
We’ll start with how to recover from an iCloud backup:
- Swipe up from the home screen.
- Tap English (or your language) and select your country or region.
- Click Configure Manually.
- Go through the different steps until you get to the Transfer your Apps & Data screen and tap From iCloud Backup. Check the date to make sure it is the backup you want.
- Sign in to your Apple ID and wait for your device to connect.
- Now choose an iCloud backup before downloading the beta. Click Show more backups to find an older one if you don’t see it.
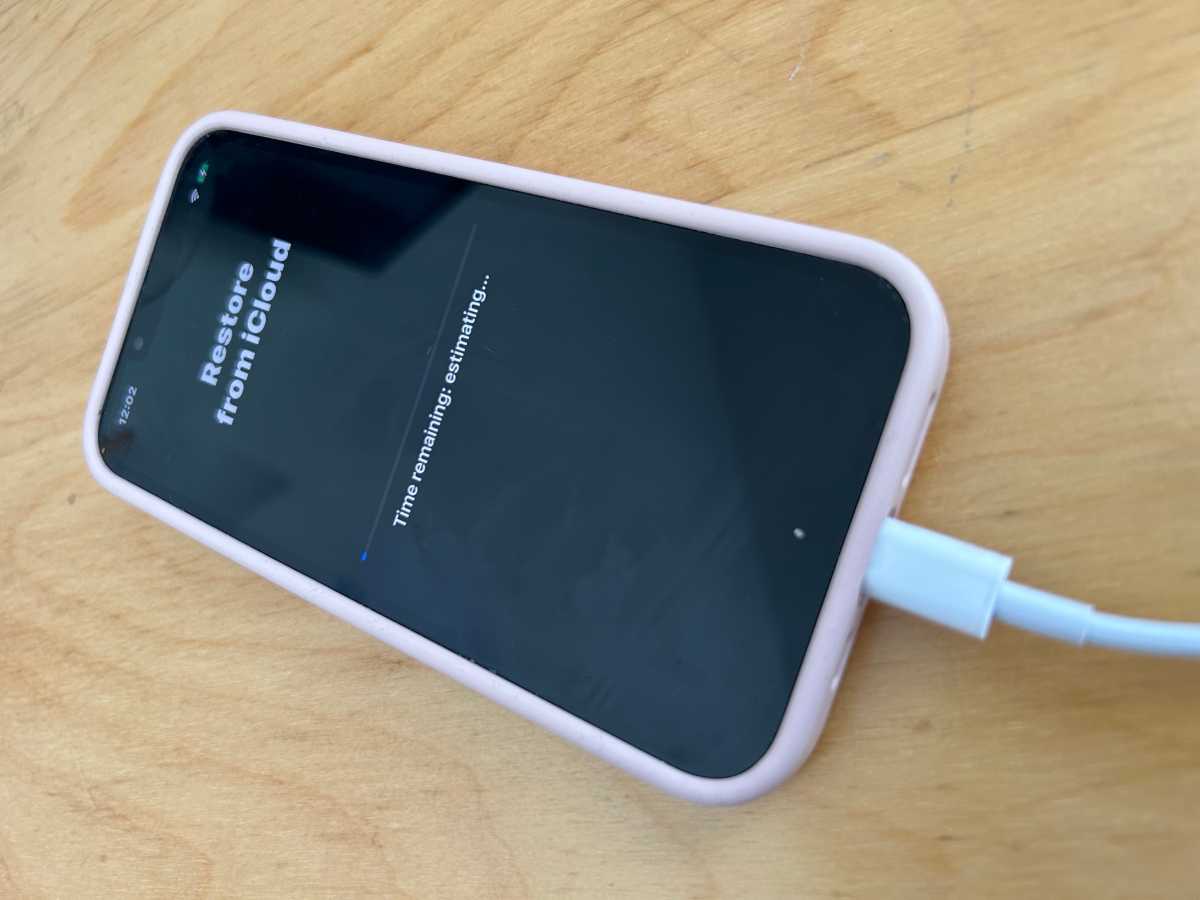
- Wait for the restore from iCloud to take place, which may take some time.
The device will need to be connected to Wi-Fi throughout the process, and this may take some time, depending on the amount of data to be restored. It’s also likely that you’ll be prompted to sign in again so that any purchased items from the App Store or iTunes Music can be downloaded.
When the basics of backing up are complete, you will be able to use the handset again, but you may notice that apps and other data continue to install in the background. It’s perfectly normal.

Foundry
How to Recover from Finder/iTunes Backup
Whether you’re using the Finder on a Mac running macOS Catalina or later, or iTunes on a macOS or older PC, the iPhone backup recovery process is similar.
- You need to plug it into a Mac or PC.
- If you have never connected the device to this particular computer before, you will see the “Welcome to your new iPhone” page.
- Click Continue, then agree to sync your iPhone.
- Once complete, you will be taken to the device summary page in Finder/iTunes, which includes various options to back up and restore your device.
- In the Backups section, you will see a button labeled Restore Backup (as long as you have one). Click here.
- If Find My is enabled, you’ll see a message telling you that it must be disabled before you can continue. To do this, open Settings on your iPhone and tap your name/face at the top of the screen, then tap iCloud. Scroll down until you see Find My, tap it, move the toggle switch to off, enter your password to confirm, then return to iTunes on your Mac or PC.
- After clicking Restore Backup, a pop-up window should appear with the iterations currently available. Select the one you want and then click the Restore button.
- Your iPhone will now run its automated restore process. iTunes will let you know when the update is complete, so you can disconnect the iPhone and go about your business with your data safely on board.

Table of Contents


