It doesn’t matter that you’ve applied all the best practices out there that have been and your headphones perform like day one: there comes a point in all battery-powered devices that the battery stops working properly, potentially making the device unusable. And that’s a real shame because, in reality, the battery of a headset is a pretty cheap item and it doesn’t take a lot of work to replace as we’ll tell you below.
Symptoms that indicate that the headset battery is not working properly
Obviously the first symptom that you will notice that the battery is not performing as it should is that it lasts for a very short time; It’s common for headphones that initially had a battery life of, say, 10 hours, after a few years see that time reduced to just 4 hours or even less. This indicates normal wear (in what is appropriate) of the battery, but if it lasts less than an hour or even if the device turns off a few minutes after disconnecting it from the power supply, you will know that the moment has come to take drastic action. measures.
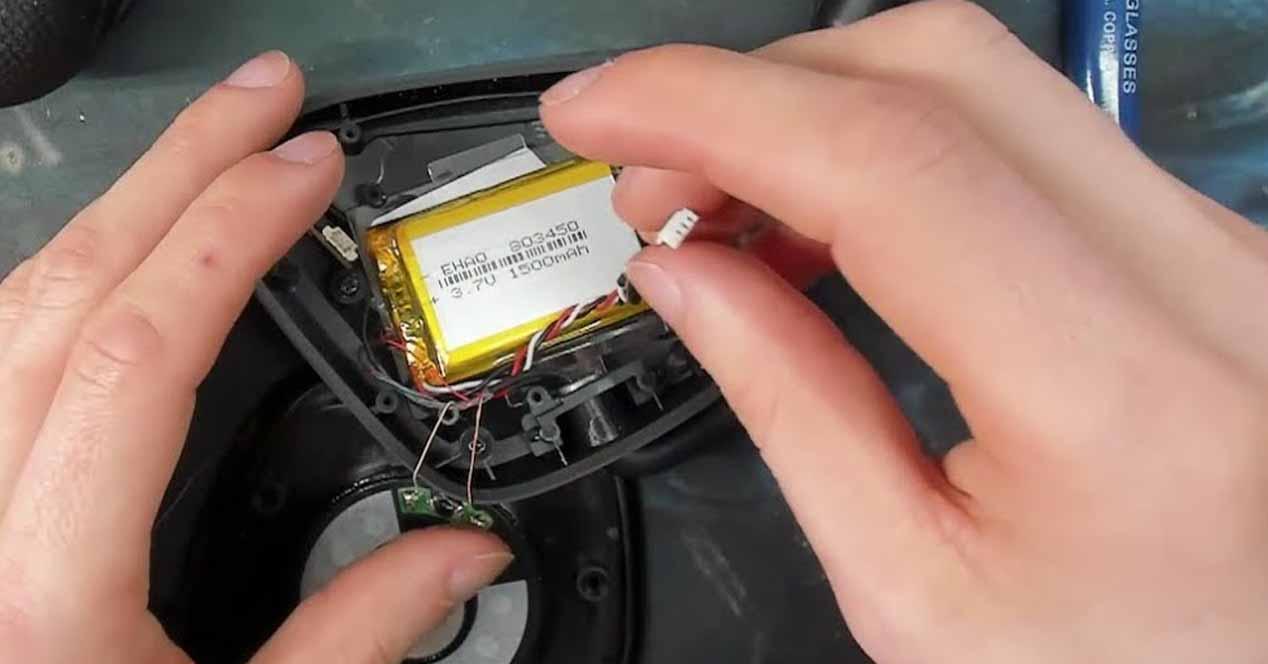
There is also the possibility, and this is more common than you might think, that the battery will be in such bad condition that it will swell and eventually “force open” the helmet from the inside (you may see a example of a swollen battery in the part above). This is also very dangerous and you will run the risk of exploding, so in this case we recommend that you replace it with a new one as there is no repair possible.
Finally, it is also tied to a battery that does not perform as it should when the wireless range of the headset is too small. The batteries provide a certain voltage for the operation of the device, but as they wear out, they provide less and less, so the wireless transmission power is also reduced.
How to repair the battery of a headset
Pretty much all the batteries built into the headphones, whatever they are, are lithium-ion, NiMH or NiCd, so let’s see what we can do to fix them (the methods are the same as, for example, the battery of a laptop).
Battery freezing
If the battery is NiMH or NiCd, by placing it in the freezer, we manage to gel the electrolyte in the battery enough for the charging process to overcome crystallization, at the same time we reduce the movement of electrons to the interior so that they can join the electricity. sink.
Ideally, for this you need to disassemble the headset in which the battery is located, disconnect it and remove it, but if you don’t want to do that, nothing happens to put the whole device in, since we will protect it previously . To do this, cover the battery or device with a dry cloth, then place it in a plastic bag, ideally with a Ziploc closure. This is important because an unsealed plastic bag does not insulate the battery from moisture.
When finished, put the battery in the freezer for about 10 hours; After this time, take the appliance out of the freezer, remove its packaging and, very importantly, allow it to thaw in the air for a few hours. When it’s completely thawed, reinstall it and see if it worked.
Apply a surge
Another, more dangerous method is to apply a surge voltage to the battery, but you have to be very careful because it could explode if you are not careful. For this reason, it is advisable to use safety glasses and gloves in order to avoid possible accidents.
The process involves removing the battery, putting thin cables in the pins and connecting them to a 5V USB source, preferably one with an amperage of 2A or more. You will obviously need an old USB cable that you can cut and strip the cables. In theory, the battery should be left connected for about 15 minutes, during which time the “extra” charge we put on it will restore some of its lost charge.
How to replace the battery with a new one
The process is really very simple since the vast majority of headphone batteries come with a connector that can have two or three pins. You just need to open the headset to remove the battery, write down its part number or its voltage and amperage, and get the same (in Chinese online stores and even Amazon if the headphones are from a reputable brand, it is very easy to find spare parts for this and they are also quite cheap). Then all you have to do is remove a battery and install the new one, plug in the cable and close the headphones afterwards.
In case your headset does not have a battery connector and it is soldered, you will need to unsolder the cables with a fine tip soldering iron and do the reverse process when installing the new battery. The process has no complications, but it is true that you have to be a bit of a handyman for that.
In any case, we recommend that if when you open the headset to access the battery you see that the area is rusted or corroded, do not bother trying to repair or replace the battery because, for the Safety, the most advisable is unfortunately, replace the headphones with new ones because it is very likely (especially if the initial symptom was that the headphones will not even turn on) that the electrical circuit of the headphones has been damaged.
Table of Contents


