Most phones save front camera photos exactly as they appear in the preview, which can lead to mirrored images. However, flipping a selfie photo can be a handy trick to fix those mirror images or adjust the orientation of your photos.
Whether you want to fix reversed text or simply prefer the way you look from a different angle, Android phones offer different ways to flip your selfie photos. Here’s a step-by-step guide on how to flip a selfie photo on your phone.
How to flip a photo on Android
If you want to flip a mirror image to its normal orientation, it’s a simple process. Your device’s built-in photo viewer may offer this functionality, but not all. For example, Google Photos (surprisingly) doesn’t include the option to flip a photo.
However, you can easily fix this problem by downloading the free Snapseed app from Google.
- Time to complete: 2 minutes
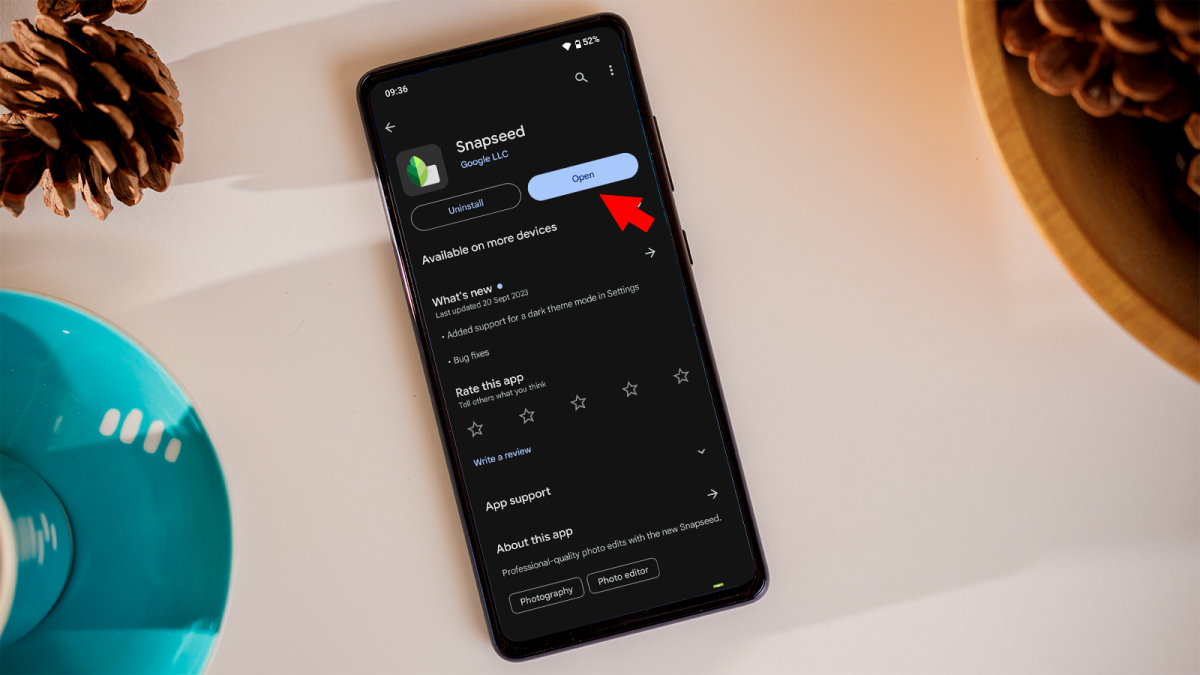
Open the Snapseed app
Dominik Tomaszewski / Foundry
To turn a mirror image in to a normal view, open the Snapseed app. You can download it for free directly from the Google Play Store.
Select photo

Dominik Tomaszewski / Foundry
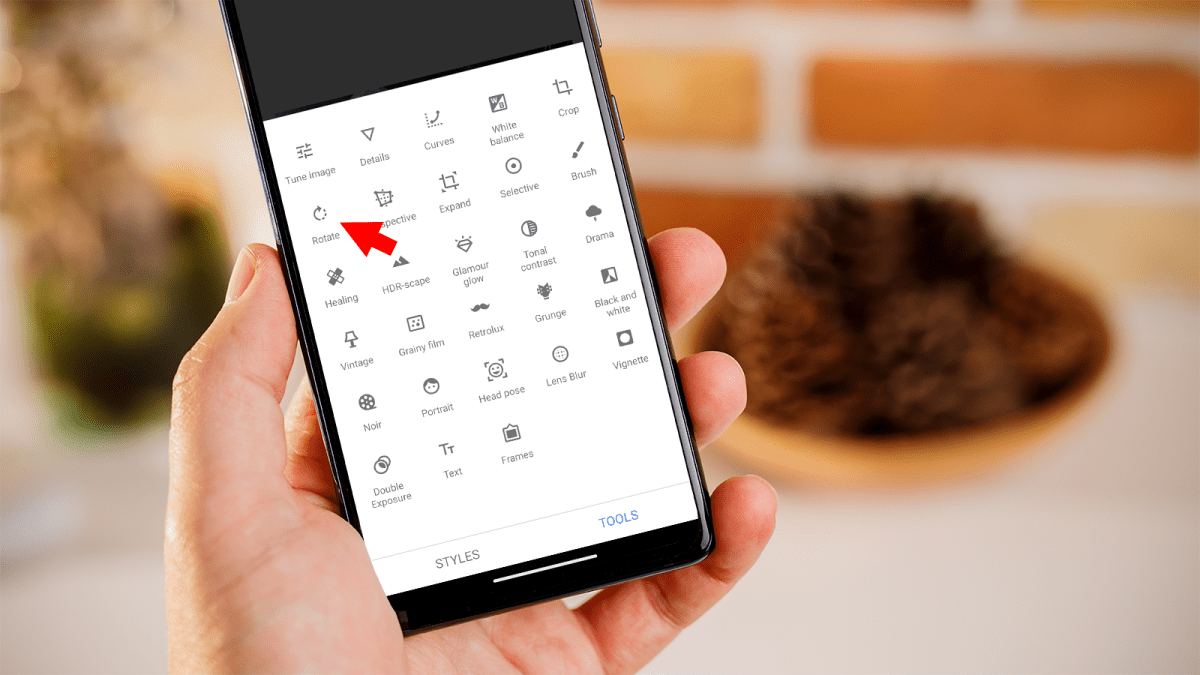
Select the photo you want to fix and tap “Tools.”
Choose to rotate the photo
Dominik Tomaszewski / Foundry
Flip the photo

Dominik Tomaszewski / Foundry
Find the icon with two arrows pointing towards each other and tap it to return the image to a normal orientation.
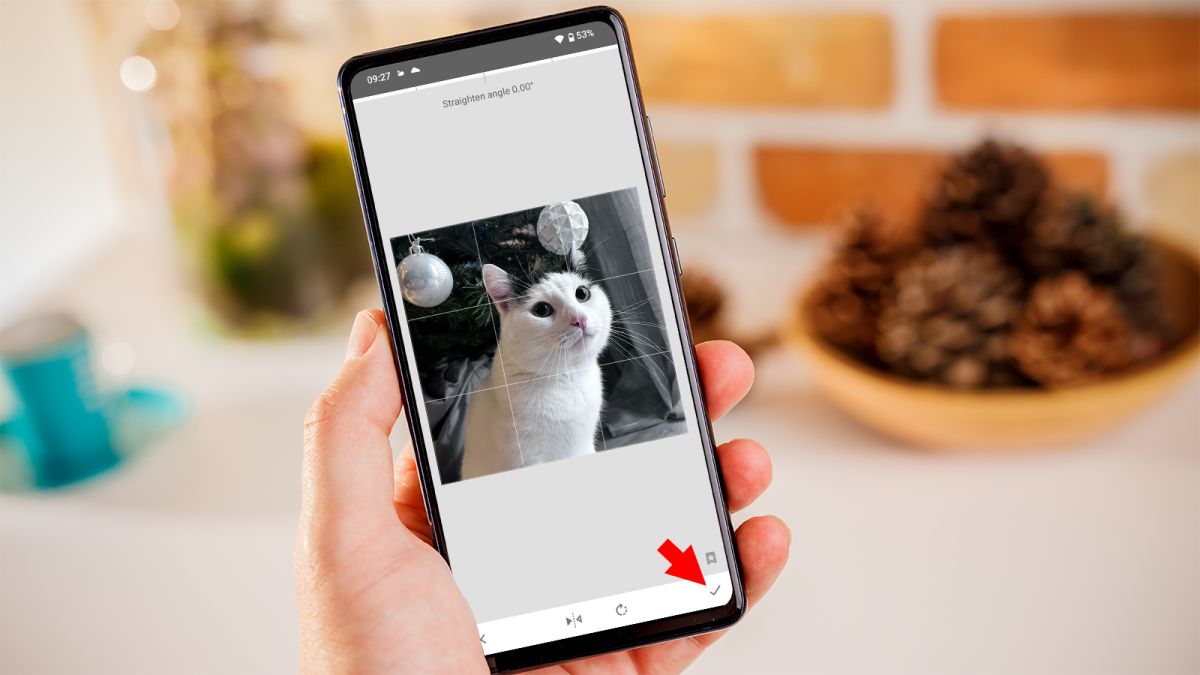
Save the photo
Dominik Tomaszewski / Foundry
Finally, save the changes by tapping the check mark icon at the bottom right corner.
Why is my photo upside down?
If your photo appears to be inverted or mirrored, it’s likely due to the way your device’s front camera captures images. When you take a selfie with the front camera, the image is often flipped horizontally by default, creating a mirror image effect. This can sometimes be confusing, especially if the text or certain details appear reversed.
The reason for this behavior is to imitate the reflection you see when you look in a mirror. Many people are used to seeing themselves reflected in real time, so front-facing cameras often invert the image to match this familiar perspective.
However, when you view the photo on your device’s screen or share it with others, it is usually displayed in its original (mirrorless) orientation, which may appear “upside down” by compared to what you are used to seeing.
To correct this, you can use photo editing tools or apps to flip or mirror the image to its original orientation. This process is simple and can be done using various editing apps available for Android devices. Additionally, some social media platforms and messaging apps offer built-in tools to flip or mirror selfies before sharing them.
Overall, while it may seem strange at first to see your selfie photo appear upside down, it’s a common aspect of front-facing camera technology designed to provide a familiar viewing experience.
How do I stop my phone from flipping my photos?
To prevent future photos from being saved in an inverted orientation, many Android phones offer settings for this, usually hidden in the “Settings” menu. Some devices even let you choose whether or not to save reverse selfies when they are initially taken.
If you’ve already chosen the mirror option and want to change it, open the Camera app and locate the “Settings” option, which can be represented by a gear icon, three dots, or a “Settings” option.
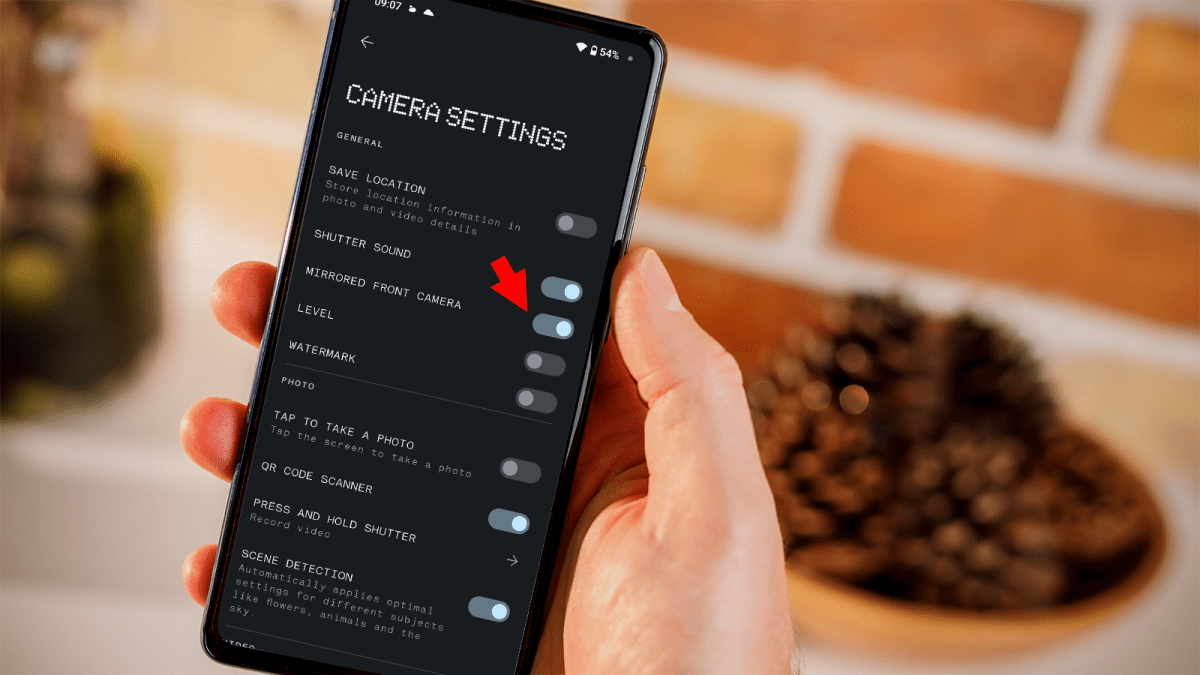
Dominik Tomaszewski / Foundry
Look for an option like “Mirror Photo”, “Images as Previewed”, “Mirror Photos for Front Camera” or something similar and turn it off to save selfies in the correct orientation. On the Nothing Phone (2), which I’m using as an example, this option is hidden under “Mirrored Front Camera”.
Note that the preview may still appear inverted when taking the photo, but the saved version will be correct. This change only applies to future photos; previous images remain unchanged.
Table of Contents


