Index
Drift DZ75 Features and Specifications
| Derivative | DZ75 |
|---|---|
| DerivativeCut | DZ75100 (+13) cm x 60 cm x 75 cm |
| DerivativeEquipment | DZ75Wood, Metal, Plastic |
| DerivativeWeight | DZ7512.5 kilograms |
| DerivativeMaximum weight supported | DZ75Up to 100kg |
| DerivativeAccessories | DZ75-Cup holder -Helmet holder XL mouse pad |
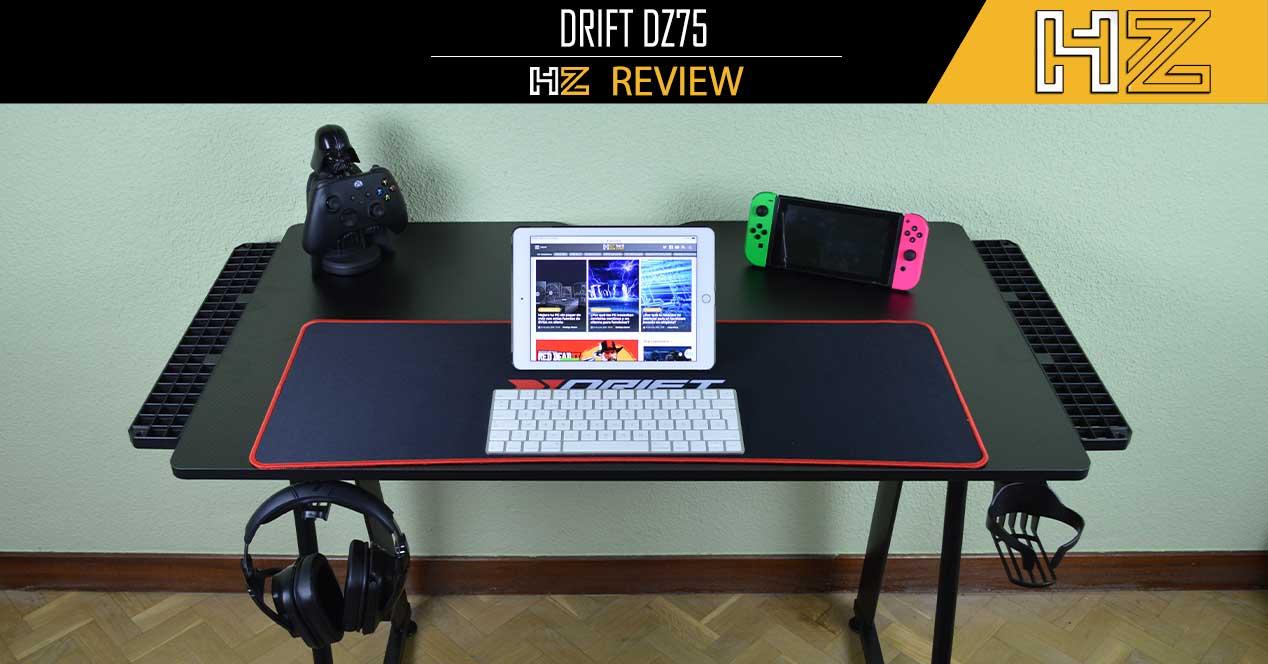
The mesa drift DZ75 It is a table designed above all to give us the best stability. This table is made of very high quality premium materials and gives us a solid structure on which to place a team of up to 100KG without problems. The board is constructed from carbon fiber laminate and the steel frame gives us the best possible stability, even during the most intense gaming sessions.
Of the game tables that Drift offers us, it is the smallest. He has a few dimensions of 100 cm x 60 cm x 75 cm, so that we can place it anywhere without any problem. If you need more space, it has an optional panel that allows us to extend its length up to 113 cm. The board has a high quality XL rugs 80 cm x 30 cm, a very resistant carpet that, in addition, we can wash to keep it always ready. The total weight of the table is 12.5 kg.
In addition, we can underline that this table includes a helmet holder that will allow us to place our headphones when we are not using them, as well as a portatazas place our drink and not be in danger while we are immersed in the game.
The assembly of this table is very simple, and in just 4 steps we can prepare it. In addition, the feet are adjustable, so you can place them as you want in order to better adapt it to the space you need.
External analysis: how does the painting come about?
The Drift DZ75 table is delivered in a rigid cardboard box. The truth is, this box is not very bulky (one meter wide, which is what the board measures), but it is quite heavy. It is recommended to move it with a second person. On the front of the box we can see a photo of the table in question, while on the back we will find its dimensions, to have an idea of how it will be once assembled.


Inside this box we will find another cardboard packaging inside. Inside, the first thing we’ll see will be the tabletop. This is well protected, especially the corners, which are the first thing usually damaged by a blow.
You will also find the assembly instructions, two stickers, the tools and hardware necessary to assemble the table.


Regarding the parts of the table frame, the first thing we will see, being the largest, are the legs. We will also find the stringers that we will use to join the two legs. And two supports with which we will fix its position and prevent the frame from moving.
We will also find the cup holder, and the support for hanging helmets.
Finally, in a separate bag, we will find the extensions for the sides of the table. These extensions are made of plastic, so they are not meant to put a lot of weight on them. But they can be useful, for example, to place the speakers of the PC. In addition, they include accessories to hold them and that they do not fall, and even a pencil holder.
There isn’t much else inside the packaging itself. In addition, all the space is used to perfection, which is appreciated in this type of accessories, because, given its volume, it is generally difficult to transport and a relatively large part is required for assembly.
Assembly of the Drift DZ75 table
The truth is that the assembly is not overly complicated, although given the volume and weight, it is recommended to do it in the company of a second person. Anyway, in our case we did it alone, so it’s possible, in case we don’t have anyone to turn to.
The first thing we will need will be the two legs and the spars.
We place the two feet vertically (they do not rest, a support wall is needed for at least one of them), and we will place the spars joining them as indicated in the instructions. We secure each stringer to the leg with a screw on each side, and voila. For this we will only need 4 large screws, without nuts.
It is also necessary to place the squares so that the structure of the table remains stable. For these squares, you need to take two large screws, and a nut, for each square.
Now the next step will be to place the plank. To do this, what we need to do is place it face down, with the holes facing up. The groove in the board indicates the back of the table (where we can pass the cables), so we have to place it in the most comfortable way for us.
Then we place the structure on the board. Care must be taken that the flat feet (those which descend perpendicularly, without an angle) are placed towards the bottom of the table. We place the table so that the holes in the board coincide with those in the table structure. We recommend that, if we place the board on the table, we use some type of fabric or protection on the floor to prevent it from getting scratched or scratched. In this step we will need the small screws.
Now we start to tighten the screws. In total, 20 screws that must be tightened little by little for the structure to be properly assembled. We recommend not to start tightening the screws as much as possible from the start, but to drive them in, give them a few turns, and when everything fits together, start tightening in the X direction. This way we We will make sure the board does not move, and all screws are properly adjusted, reducing the risk of cracking the board.
When we have finished this assembly, the next step will be to place the cup holder and the holder for the headphones. To do this, we simply place them where we want (coinciding with the available holes) and fix them with the same screws as the table top.


We can also take advantage of the fact that the table is upside down to place the plastic pieces at the ends, which will allow us to easily enlarge the size of the table.
And finally, the table legs. We simply place them on the feet and tighten them by turning them until they are fully inserted. It is not recommended to leave them half-tight to gain only a few centimeters in height, as this can be dangerous.
Now we just have to walk around the table (again we recommend the help of a second person) and that’s it. We’ll clean up the dust, lay out the carpet, and we’ll have our Drift DZ75 ready to give it our all.
Conclusion, a gaming table up to the task?
Gaming tables, in general, are quite expensive accessories. And that means they’re not available to many. However, Drift opted for a table of more than acceptable quality to suit all budgets. The Drift DZ75 is a relatively small table (compared to other models, which can be 20% or 30% larger). It also doesn’t have unnecessary features like RGB lighting, as the manufacturer has focused on lowering the price of the product without sacrificing quality.
We are faced with a table that is 1 meter long, a size more than sufficient for any type of PC that we wish to assemble. The same is true that if we have a very wide tower, and we want to place an ultra-panoramic monitor, the space will be between passable and insufficient. But for most users, this counter (and the extra 13cm) is more than enough. The assembly is not complicated, although it is true that tightening the 20 screws on the board has become very heavy.
The helmet holder is of course one of the most interesting “extras” you can find. The cup holder, on the other hand, feels too big to us, as I’m not sure what drinks will hold the Drift tables, but all kinds of cans and bottles are too baggy. In addition, the height is quite small, so a nudge or careless bump will have a tragic end.
Including the mat is also a plus that is appreciated. This mat is big enough to place our PC keyboard and mouse and not damage the surface over time. It could have been wider or covered the entire surface of the table. But, for a table of 100 dollars, it is more than enough.
For all this we decided to give the table DZ75 fin our price of oro, emphasizing above all its price quality.
Table of Contents


