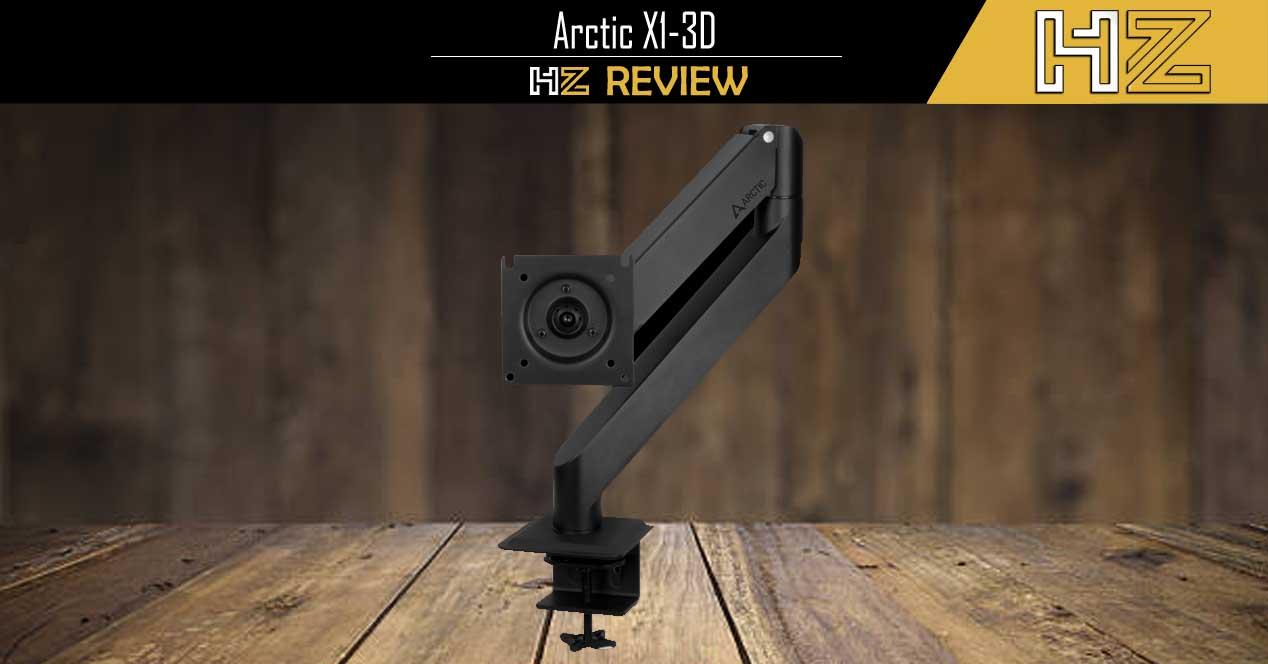
That said, the Arctic X1 3D is compatible with monitors from up to 10 kg weight and up to 40″ diagonal for standard widescreens and up to 43″ for ultrawidescreens. The arm has a lift through adjustable gas piston, allowing us to comfortably raise and lower the screen without any effort (since the effort is made by the piston). On top of that, we can literally move the screen to any position thanks to its 360 degree rotation and 180 degree tilt (which, since it’s up and down, we also have 360 degrees).
Finally, it should be noted that Arctic has provided a total cable management system, which will allow us to hide the cables throughout the arm in a comfortable way and without having to do fancy things.
Unboxing and external analysis
Arctic packed its X1 3D in a hard black and white cardboard box, as is customary with this manufacturer. In the outer area we have an image of the product accompanied by a summary of its compatibility for the front, leaving its technical specifications for the back. There we also have a QR that will take us to the brand’s technical support website, and this is complemented by another QR that we find on the side and which will take us to the online manual, including a video of facility.
We open the box and find the product protected by partitions of hard cardboard and a neutral color, and it is surprising that as soon as we open the box we have a manual of assembly instructions in physical format despite the fact that, as d Usually, the manufacturers put us a simple QR that takes us to their website for this.
Here are the contents of the box: The arm itself is divided into two sections, which are the table stand and the arm. We also have a variety of accessories, such as velcro straps, plastic channel, hardware and three sizes of allen wrenches to adjust the arm.
Let’s start by looking at the table’s anchor. As you can see, it is black and has rubber protections both on the upper part (the one that will touch the table from above) and on the lower part (the one that will touch it from below). The anchoring method is simply by pressure, by making a thread by hand.
Here you can see the pressure surface below is quite generous, and it won’t help the whole weight of arm and monitor to press on the same point. Additionally, the anchor is rubberized to protect the integrity of the table.
The upper area consists of a simple short bar, in which you have to insert the other part of the arm. This anchoring between the two parts is done simply by pressure, it is not necessary to screw anything.
Now let’s see the movable arm, which actually consists of three movable parts that make up the game that allows you to move the screen to any position.
Of course, the product has quality details such as the screen printing of the brand logo.
As we mentioned before, the whole arm has channels through which you can insert the cables and thus hide them and prevent them from hanging down, in addition to having a rest so that nothing is damaged or disconnected when moving the arm with the monitor connected.
In the arm itself we have screws that will allow us to adjust the hardness of the elevation. Initially, the arm is “configured” for fairly heavy monitors, and as we will see right away we used a 24″ monitor and about 6 Kg, so it had to be adjusted because, otherwise, the gas piston was still pulling up and we put the screen in the highest position. It is imperative that once the monitor is installed, we adjust this screw to adapt the gas pressure to the weight and that the monitor is always fixed at the height at which we place it.
Here we have the arm to monitor anchor point, which as you can see has two sets of holes for the VESA 75 and VESA 100 anchor types. We can also see a ball joint in the center that will allow us easily tilt and swivel the monitor.
In addition to this ball joint, on the back the arm also has another axis that allows us to rotate the position of the screen as we wish, thanks to which the possibility of placing it in the desired 360 degree position is completed.


After seeing the device, we will proceed to mount a monitor on it and place it on a table to see how the assembly goes.
Assembly
The first step is to mount the base on the table, and for this it is enough to open the screw so that the drill bit is thick enough, insert it into the edge of the table in the desired position, and then tighten.


Once this part is already fixed to the table, we move on to the other part of the arm and what we have to do is anchor it to the monitor. Logically, you will first need to disassemble the base of your monitor and have access to its VESA anchor; In our case, we’re using a 24-inch monitor from Newskill that has a VESA 75 mount, so we’re laying the piece out to match the holes.
Once done, we place the screws (but we recommend that you do not tighten them completely until all 4 are in place, in order to have a little play to make the four perfectly coincide) and it will be fixed .


Once we have fixed the arm to the monitor, all that remains is to join the two parts and insert the arm into the support that we previously placed on the table. This, as we said before, is done simply by placing it on top and pressing down a little, as gravity will do the rest of the work.
With this we have already mounted it; As you can see, there are simply three steps in a nutshell:
- Anchor the base to the table.
- Anchor the arm to the monitor.
- Mount the arm on the support.
After that, we will logically have to connect the monitor and route the cables.
Arctic X1 3D review
As you have seen, mounting the Arctic X1 3D is extremely easy, and even a user who has never mounted a monitor arm can do so effortlessly in minutes. And it’s really Arctic that demonstrates its great experience in this field, where they have already mastered not only the quality and robustness of the components necessary to support the weight of a monitor and provide it with the maximum possible ergonomics, but have also simplified both its assembly which anyone could easily do.
The operation of the Arctic X1 3D arm is extremely simple, and initially the only difficulty we will encounter is that we will have to try to adjust the screw that we mentioned previously to adjust it to the weight of the monitor, so that we can place the screen in the desired position without the gas piston lifting it upwards. This, in any case, only needs to be done the first time and then we can forget about it.
We can say little about this mobile arm for monitors, since as we have mentioned from the beginning, it allows us to place the screen in any position we want, both in height and in rotation, tilt or distance from the user.
In this regard, we consider the ergonomics of this mobile arm to be simply perfect and, as we have already said, we can add little in this regard.
Conclusion and judgment
With the X1 3D, we think Arctic has created the perfect monitor arm: it’s extremely sturdy, it couldn’t be easier to set up and it gives us unquestionable ergonomics, making it ideal for all purposes. Also remember that its recommended retail price is only $ 63.99 in the manufacturer’s online store, although at the time of writing this review it has a 20% discount and you can buy it for just $51.19.
We must highlight the use of a gas piston to support the weight of the monitor and allow the user to raise and lower the screen effortlessly, and although the use of a gas piston may affect some users due to its durability, we have to remember provided by Arctic This product comes with a six-year warranty, which is no small feat.
Some of you may be wondering if it’s that good, why not give it a perfect rating? Well, because even if it’s the top of the top, everything can always be improved: for example, we would like it to be placed completely vertically, or if the adjustment of the piston force was done with a manual crank instead of having to use an Allen key.
Overall, we think this is the best monitor arm on the market, and we can’t help but give it our Platinum award, as well as our recommendation for its performance and, what’s more, its sound. incredible value for money.
Table of Contents


