
If you use Gmail for business purposes, you should add a signature at the end of each email email you send, and Google has two sections from which you can customize that signature to appear automatically.
[5 trucos infalibles que uso para limpiar Gmail y que no lleguen tantos correos]
Signing in emails is something that is the order of the day and pretty much anyone in the workplace that you exchange emails with will have theirs set up so that automatically appear at the end of each one.
You’ll now learn two different ways to create and use your Gmail auto-signature, so consider whether you want it to take a photo or a different format of the email body.
Configure your Gmail signature from your mobile
Signing in Gmail for mobile
The free Android
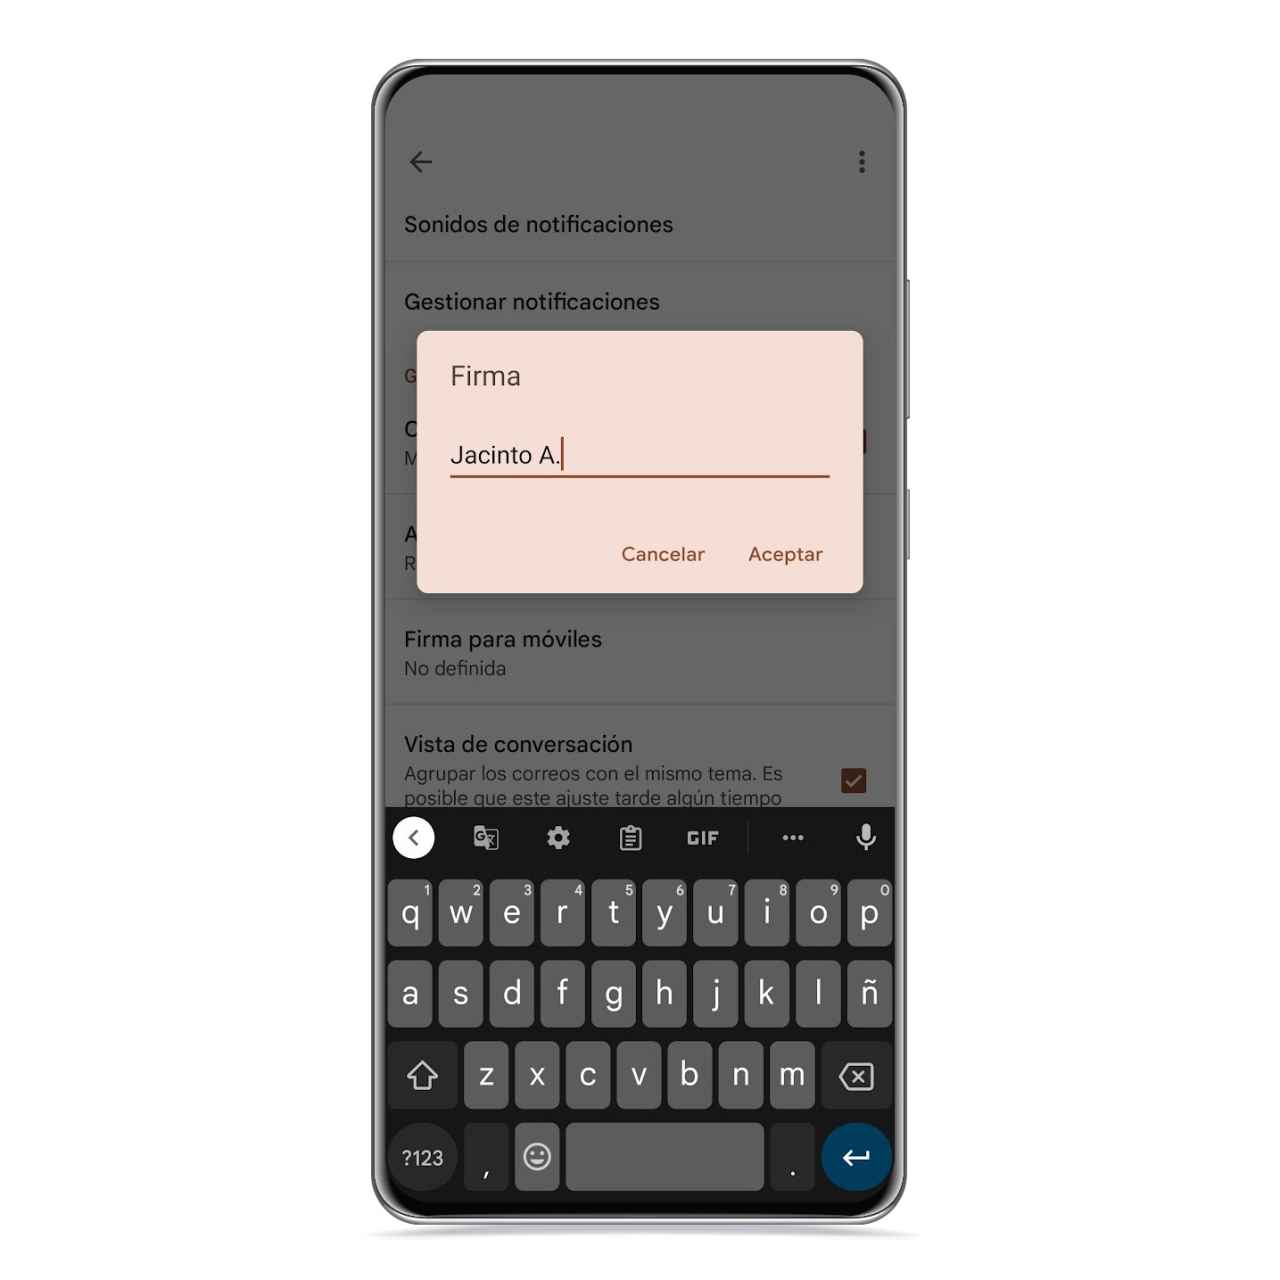
If you want to configure your Gmail signature from your mobile phone, be aware that this will be created as plain text and raw, so it will have a rather sober look. You just have to follow these steps:
- Open the options side menu in Gmail.
- Click on the email for which you want to create a signature.
- Click the sign button.
- Write the signature you want to put.
In general, it is usually put first your name and a line below your position or company, although this is left to your choice.
Of course, if you want to add a photograph to the signature or change its format so that it has a different font or color than the body of the email, you will have to resort to the method performed on the computer.
Configure your Gmail signature from your computer
Signing in Gmail from a computer
The free Android
If you want professionalize a little more the signature that you are going to put in Gmail, It is better to configure it from the computer, because you will be able to access more options. You just have to follow these steps:
- Open Gmail settings on your computer.
- In the General section, scroll down to Signature.
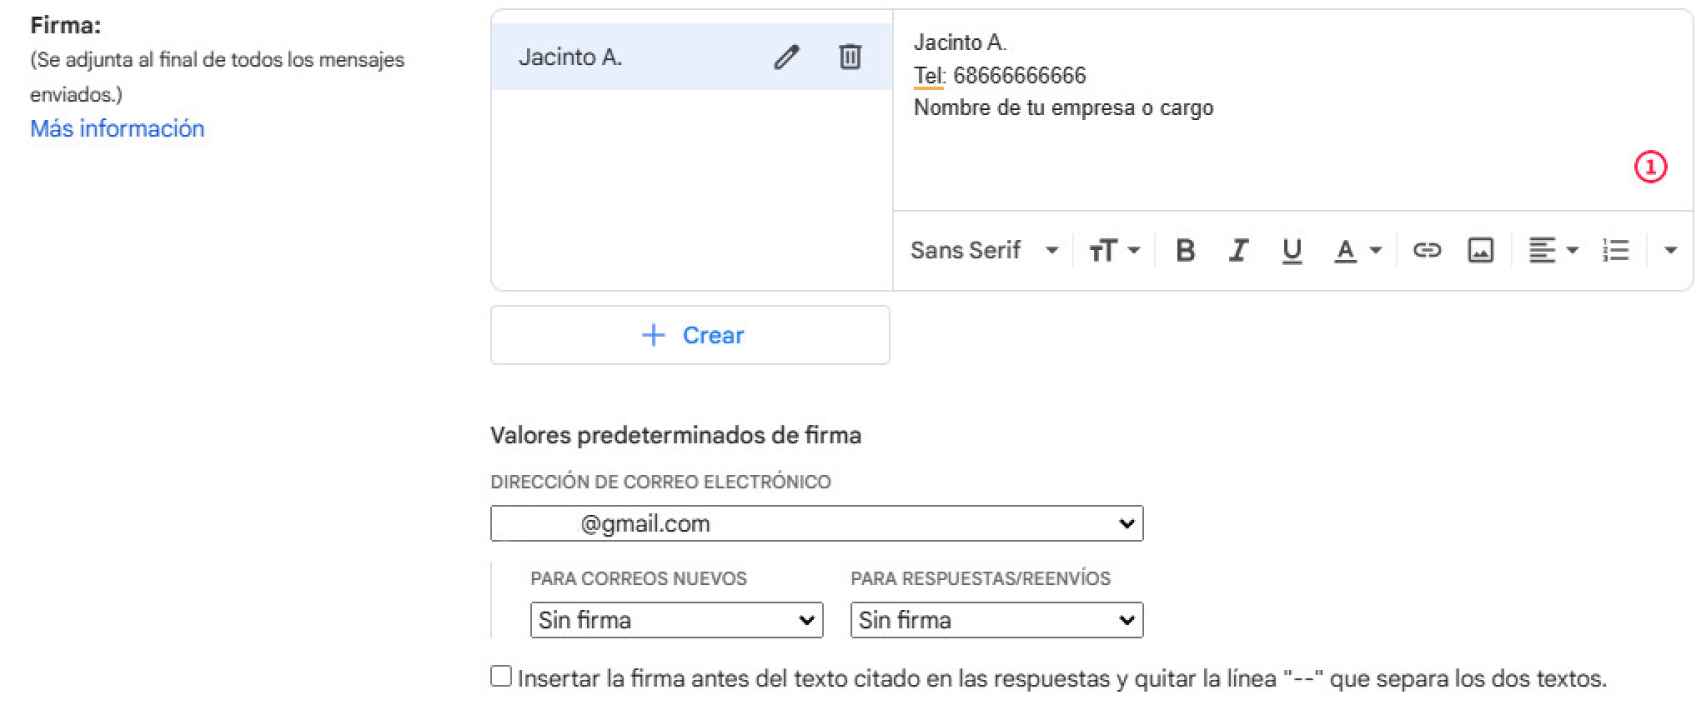
- Click on Create and Name your signature.
When you add the name you will see that a small editor opens where you must enter the signature itself, since the name you just put just works at an identification level so you know what signature you’re editing.
In this new section, you will be able to check how Gmail offers the possibility of adding even more content to the signature, such as an image, something that many people usually use to put their company or brand logo.
Thanks to the text tools, you will also be able to modify the format of the text slightly, adding a bold underline and even allowing you to change the font.
You may be interested
Follow the topics that interest you