Do It Yourself (Do It Yourself) projects can be very diverse, but there is always one common thread and that is that you have to nurture whatever you roll. Whatever your needs, a PC power supply would almost certainly do what you need if it had the right connectors, right? Well, we’ll teach you how to do it yourself.
How to turn an ATX PC source into a DIY source
Usually, when you change the PC power supply it is because the previous one was damaged, but it is also possible that you changed the source because you directly changed the PC, because you bought a new graphics card and the the previous source did not have enough power, or just for convenience when switching from a normal source to a modular source. Anyway, as long as the source is ATX it will be valid for this project, since these types of sources have normalized voltages which are those that will be used in the projects (+ 12V, + 5V and + 3.3V) .

As a general rule and as we said, as long as the source is ATX it will be worth converting it to a DIY lab source, but we do not recommend using non-standard sources for this and that they have at least 300 watts
For this project, you can use the power supply’s own box if you wish, although it would be ideal to have a 3D printer with the correct dimensions and connectors. In any case, you can use the inside of the source as it is, with its connector and its power switch without problem and thus take advantage of the different voltage outputs to have several connectors in your project.
Identify the cables that interest us
The first step is to identify all of the cables from the source that are the ones that interest us; suppose you are using an old, non-modular source, but for modular sources it would be the same but obviously with the cables connected. The only cable we are interested in is the one with the 24 pin ATX connector, which you will need to cut and keep the following cables:

- You will need at least 6 of the 8 ground pins.
- At least one + 5V cable.
- The + 5VSB cable, since although it provides the same 5V as the previous one, it cont inues to supply them even if the source is switched off, so it is used, for example, to charge a USB device even if the PC is switched off.
- At least one + 3.3V cable.
- The two cables + 12V.
- The PS-ON cable; Like the + 5VSB there is only one and it is the one which, when it closes the circuit with the mass, triggers the operation of the source.
These are all cables we are interested in in the first place and unless you intend to make a much more advanced DIY ATX source, the rest of the source cables are safe to dispose of.
Prepare the wiring of your DIY ATX source
After seeing which cables we are interested in, the first thing to do is to disassemble the source and select the cables that we have listed before, eliminating all the others. It is ideal to unsolder them, but if it is not enough to just cut them and tape them at the cut end so that they cannot bypass them or doom them to hot glue, your choice is up to you. .
In the end, you should end up with the following clean cables:
- 2 of + 12V.
- 1 of + 5V.
- 1 of + 5VSB.
- 1 of + 3.3V.
- 6 grounding.
- 1 PS-ON.
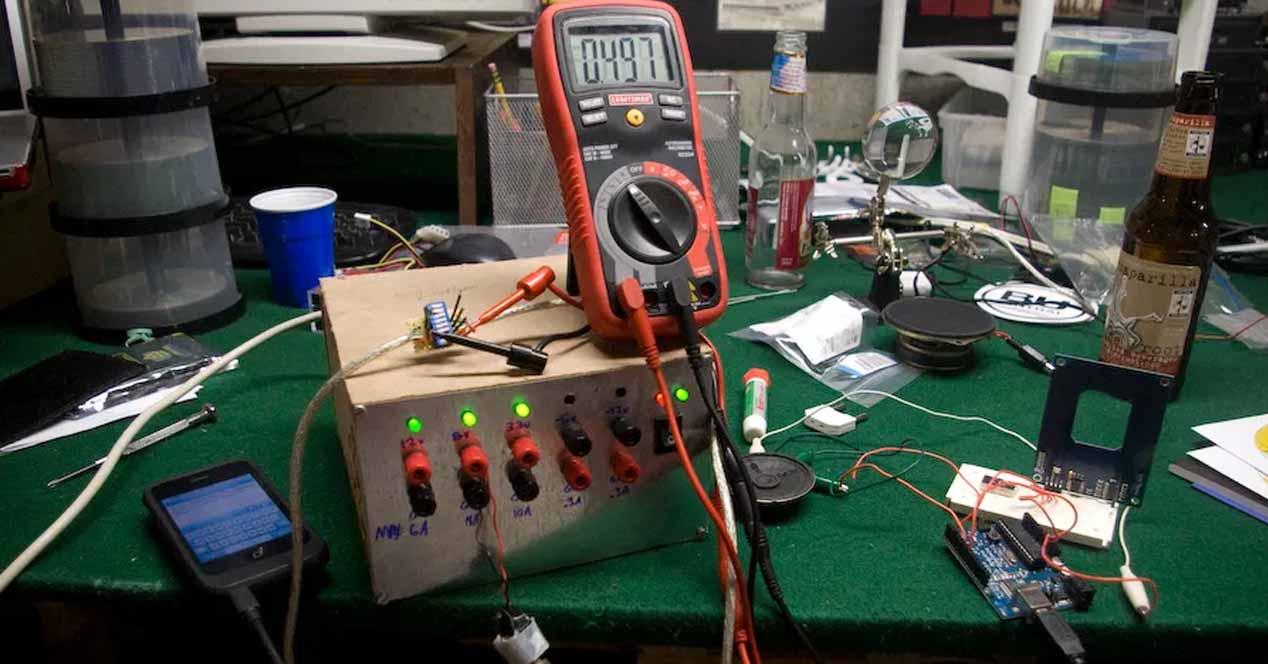
Now depending on how you want to mount your DIY ATX source, you will need to create a support for the connectors (that’s why we told you about the 3D printer), but you can also drill one of the sides of the source and make them go out there. Obviously you can add switches or other elements to your liking, it depends on your maneuverability and the desire and the materials you have.

Now to connect the external devices we will need other components called bananas, so in the source we will have to install female banana connectors 4mm in diameter. You need 1 banana plug for the earth connection and 5 more for the different voltages, but you can add whatever you want (the cables we marked before are the “at least” ones but you can use the ones which you need).
Likewise, it is ideal to have the following materials:
- A switch, although you can take advantage of the source itself.
- Two status LEDs (red).
- Two 220 Ohm resistors.
- A 10A fuse holder with its corresponding fuse.
- An LM317 voltage regulator. It is usually already sold with a heat sink installed and with a potentiometer, as it can regulate the voltage from 1.2 to 37V.
- If desired, a voltmeter with a display that allows you to read the voltage of the regulator.
Internal connections
This would be the connection diagram, so prepare the bananas and the materials as you will need to solder.

Let’s explain how this diagram works: grounding is shared between all connections and the power circuit, so you can use each of the grounding wires for each of the other wires: you don’t need to ‘have only one that connects each one of the elements that need to be grounded.
The resistors and one of the LEDs will tell us if there is current in the VSB socket, while the other LED is for the 5V socket and will indicate whether or not we have turned on the power through the PS-ON cable. . For added safety, a fuse is added to the earth connection and the rest of the connections are direct. Finally, as for the LM317 circuit, the card used has two input pins: one goes to the 12V cable and the other to the earth sockets. The two corresponding connectors and a voltmeter are connected to the output if you want to see the voltage selected on the regulator potentiometer.
Table of Contents