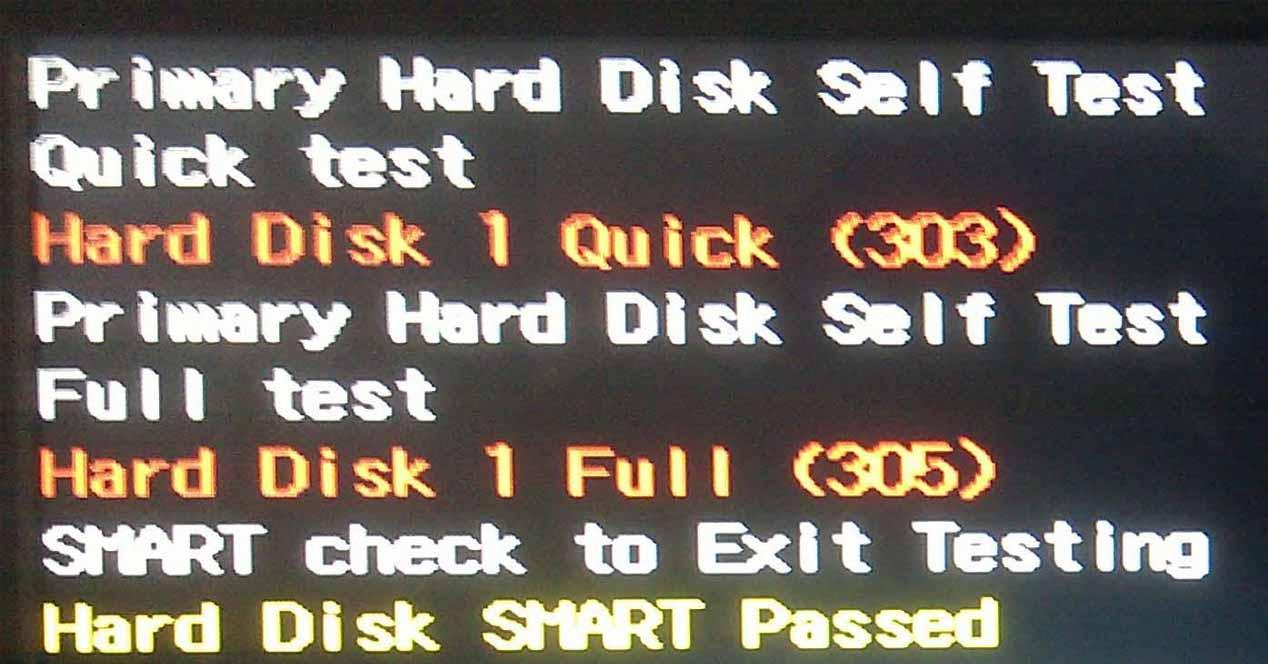
Before you begin, you should know that if you have reached the point where you have received any of these errors, you are at great risk that the data on the drive will be lost forever as these errors indicate that something is wrong. bad happens to the hard drive because POST could not initialize it. The first recommendation, of course, is that you buy a new unit, but let’s see what you can do about it.
Quick 303 and Full 305 error on hard drive, why do they appear?
These errors can appear when the computer starts up during POST, at which time the computer checks the hardware. These are specific errors of the hard drive and more precisely of a mechanical hard drive (does not display on SSD) that indicate that it is starting to fail or is dead and you need to replace it. The ideal is to replace the failed drive with a new one, but there are some things you can do to try to repair the drive that can sometimes help you back up the data you have on it.
There are times when these errors can also appear while running diagnostic tools, such as the BIOS itself.
Likewise, hard drive errors 305, 303, and 301 can even appear in third-party software tools that check the integrity of a hard drive; The point is that wherever some of these errors have appeared, you should prepare yourself because they are quite serious, and from now on we tell you that if you manage to solve them, you should feel very lucky.
What should you do if you receive any of these errors?
The first thing to do is, as we have already mentioned, not to take risks and shopping for a new hard drive to replace the problematic one, although, as we will tell you below, there are still possibilities to be able to “back up” the device, and even if you manage to fix it, there are many possibilities that you will experience the error again sooner or later because of this hard drive malfunction.
That being said, there are several ways to fix these Quick 303 and Full 305 errors, but whether or not they work will depend on the actual condition of the drive as sometimes it happens that it is completely dead and the damage is irreversible. We will see him.
The recovery drive is the key
Normally, despite receiving these errors, the PC may continue to start up, although it is true that you may have multiple blue screens (BSODs) and the system is running very, very slowly. In any case, you can also go to another PC (like a family or a friend for example), and connect the hard drive that is causing you problems to do so.
The first thing to do is to create a recovery drive, for which you will also need a USB stick or external hard drive of at least 16 GB capacity. Click on the Start button in Windows and type “Recovery drive” to access the tool, and on the first screen, make sure that the option to make a backup copy of the system files in the recovery drive is checked.
Click next and wait a few seconds (or minutes, depending on disk performance) for the application to collect the necessary information from the system. In the next step, you need to connect the USB storage drive and select it (note that all its contents will be erased by doing this, and in fact a warning message will appear after selecting the drive and clicking Next).
In the next step, click on Create and wait for the automatic process to take care of everything.
When done, restart the system and boot from the recovery disc you just created. Select Advanced Options and Command Prompt, from which you need to run the following command:
chkdsk / f / r
This will take a deep look at the health of the hard drive and fix any issues it is capable of.
Meanwhile, as we recommended earlier, you need to replace the failed hard drive and restore the system as you had before creating the recovery drive (in addition to running CHKDSK in the previous step), so it’s time to reboot and restart the system from the usb drive we created earlier.
On this occasion, you must choose in the menu the option Diagnostics / Advanced settings / Recovery of the system image, and simply continue the process by following the instructions of the wizard (basically, it is a question of clicking Next all the time with the default options). The rest will be done automatically by the entire recovery program.
Once done and if all has gone well, you will have your system as you had it in terms of documents, files and settings, but you should keep in mind that the programs and games you have installed will need to be reinstalled again, as these are not transferred when creating the system image disk, only settings and documents (otherwise you would need a fairly large unit, the size of which would depend on the number of programs and others that you have installed).
In short, in this article, we have told you how to backup and restore your files and settings when the disk drive crashes with Quick 303 and Full 305 errors, but the summary of it all is that hard drive is dead or about to die. and you will have to replace it irreparably with a new one.


